6KW 220-380V Stainless Steel Sauna Heating External Control Sauna Stove Heater
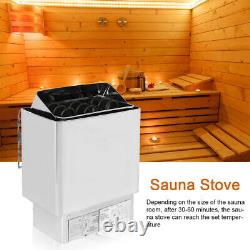
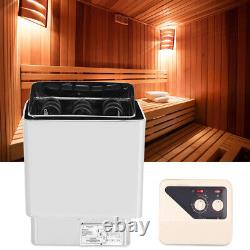
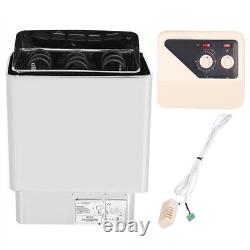
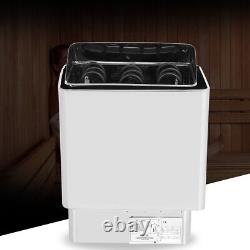
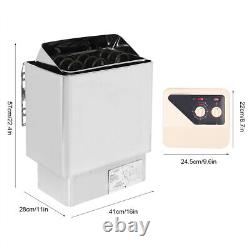
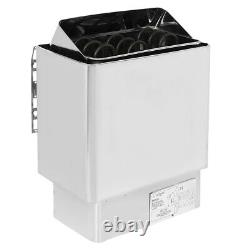
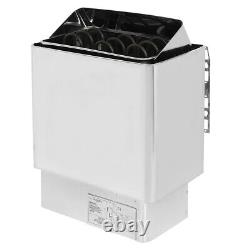
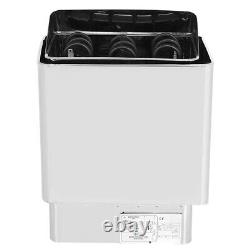
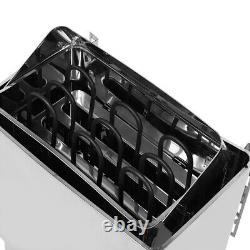

The sauna furnace is made of high temperature resistant zinc and magnesium plate with built-in control system placed on the right or left side of the furnace body. The control system also has a signal device that displays when the meter and temperature regulator are turned on. Depending on the size of the sauna room, after 30-60 minutes, the sauna stove can reach the set temperature, and the thermostat can ensure that the sauna room maintains an even and comfortable temperature. Necessary conditions relative humidity 15%-30% temperature 65-85? (do not cause unnecessary skin injury). The machine is easy to install and can be placed in a sauna room by adjusting the leg support frame. Featuring knob or digital display controller 30-120? Thermostat and 1-8 hour time controller. Use Space: 5-9m / 16.4-29.5ft. Suitable for: Apartments, hotels, indoor swimming pools, saunas, sweat rooms, fitness centers and other commercial facilities. Above 500mm Shelf on the Ground Minimum Distance: Approx. Suspended Ceiling Minimum Distance: Approx.
57 x 41 x 28cm / 22.4 x 16 x 11in. External Control Device Size: Approx. 24.5 x 22 x 8cm / 9.6 x 8.7 x 3.1in. 1 x External Control Device.
Install the sauna stove to the wall by yourself with the equipped screw; the stove can also be installed with the lowest height of 1900 mm. The wall behind the stove shall not be covered board or similar material. Because the cladding will cause the wall material to exceed the allowable temperature limit. Qualified materials should be selected for the wall and ceiling. Connection of power cord shall be completed by professional electrician and with current specifications. Use REVE rubber insulated cable (or similar) to connect to the main power source of the furnace. The connection box of the stove is equipped with a terminal and the section of the connection wire is the same as the power wire of the sauna stove. The junction boxes in the sauna room must be airtight and have moisture condensation holes with a diameter of 7 mm.The center of the box shall not be higher than 500 mm above the ground. Sauna stones may contain dust, so it is recommended that they be washed before being placed in the stone bin.
The largest stones should be placed at the bottom, not too tight, leaving room for ventilation. Stones must be replaced when they begin to peel to avoid damaging the sauna stove. Stones are usually 3-8 centimeters in diameter. Temperature control: thermostat can control the temperature at the ideal state. Depending on the size of the sauna room, the sauna stove can reach the set temperature after 30-60 minutes.
Three - phase thermostat can ensure that the sauna room to maintain a comfortable temperature. Ventilation: in order to make sauna as comfortable as possible, sauna room must have good ventilation. It is best to drill a hole in the wall panel near the bottom of the sauna stove to let air in. The diameter of the air inlet should be at least 6 cm.
The air outlet should be on the wall opposite the air inlet and as far away from the air inlet as possible. The air outlet should be twice the diameter of the air inlet and should be as far away from the ground as possible and lower than the upper chair. The power switch is the main power switch of the sauna stove. Note that the upper screw should be tightened properly, leaving a 3mm between the screw head and the wall.
After installing the sauna stove and controller, place an appropriate amount of sauna stone (10-15kg) on the sauna stove. Note: sauna furnace internal temperature is very high, must use quality sauna stone, temperature difference stone. After heating and watering in the furnace, it is easy to burst and damage the electric heat pipe, or easily oxidize and hinder the heat circulation of the furnace, thus causing damage to the sauna furnace.
Carefully remove the cover on the edge of the circuit board of the temperature sensor with a small screwdriver. Fix the circuit board of the temperature sensor directly above the sauna stove with screws. Put the cover on the circuit board of the temperature sensor. Instead of leaving negative/neutral feedback or opening a dispute. Our listing price includes the value of goods, packaging cost, and export. Please check with your country's.We will reply your message within 48 hours. If you do not receive our reply within 48 hours, pls.
Post a message again because sometimes our message system may block some emails. If you are satisfied with our service, pls. Our aim is to provide Level Customer Service, your recognition will encourage us greatly and serve you better. We strive to keep all our customers satisfy. We will do our up most to exceed your expectations in customer service, communication and dispatching of your orders.This item is in the category "Home, Furniture & DIY\Bath\Showers, Baths & Parts\Indoor Whirlpools". The seller is "binggoshop" and is located in this country: CN.
This item can be shipped worldwide.- Type: Sauna Stove
- Size: Approx. 57 x 41 x 28cm / 22.4 x 16 x 11in
- External Control Device Size: Approx. 24.5 x 22 x 8cm / 9.6 x 8.7 x 3.1in
- Material: Stainless Steel
- Use Space: 5-9m / 16.4-29.5ft
- Power: 6KW
- Item Weight: Approx. 10750g / 379oz
- Above 500mm Shelf on the Ground Minimum Distance: Approx. 15cm / 5.9in
- Weight: Approx. 10750g / 379oz
- Suitable for: Apartments, hotels, indoor swimming pools
- Suspended Ceiling Minimum Distance: Approx. 110cm / 43.3in
- Ground Minimum Distance: Approx. 18cm / 7.1in
- Furnace Tube Voltage: 220-380V
- Lateral Minimum Distance: Approx. 10cm / 3.9in
- Brand: Unbranded

